Restorative Yoga Postures
The holiday season, from Thanksgiving through New Years, can be a time of great joy, family gatherings, feasting, and fun. This season can also leave our energy drained after dealing with the stress of traveling, shopping, cooking, late night gatherings, overload of sweets and other foods, and general sensory overstimulation. When we become drained of energy, sometimes we look for a quick fix – a cup of coffee or other forms of caffeine for example, or we ignore our bodies’ run down feeling and keep pushing ourselves to be on the go. If you are feeling signs of low energy after the holidays (fatigue, easily irritable, falling sick often, trouble concentrating, and low energy in general), then it is important that you take time to rest and restore.
Restorative yoga postures are simple poses, usually done with props (blankets, bolsters, straps, and blocks), held for long periods of time to deeply benefit and restore the nervous system, immune system, and overall state of wellbeing. Ideally, a restorative yoga practice should be done weekly. However, for those who do not practice regularly, at least taking some time after the holidays or when energy is drained is recommended for healing, and overall good health.
Restorative yoga poses reset the body’s systems back to a state of equilibrium or balance. When holding restful poses for a long time, the body begins to heal itself deeply from within. If we are constantly on the go, depleting our inner resources, we are not giving our bodies the quiet time needed to heal and reenergize. Restorative poses also work by activating the parasympathetic nervous system (the resting system as opposed to the sympathetic “fight or flight” mode), and thus help us feel more relaxed and in control. Besides the physical benefits, restorative yoga poses can help one feel calmer and better equipped mentally to deal with life’s daily stressors.
Although restorative yoga is usually done with yoga props, you can substitute blankets, towels, and pillows to practice from home.
Following are three simple restorative poses you can try when fatigued. To maximize the benefits, each pose should be held for a minimum of 2 minutes, but ideally for 5-15 minutes each.
Start with a yoga mat or comfortable lying place, and a few blankets and pillows. If you wear eyeglasses, best to remove them so that your eyes can relax.
Prepare for your practice with 2-5 minutes of silence and deep breathing. Sit comfortably (either cross legged on the floor, on a pillow for support, or in a chair with back straight and both feet on the floor). Ground your tailbone down while reaching crown of the head upwards to lengthen your spine. Lift chest and collarbones, and relax shoulders down the back. Breath is slow, long (at least a count of 4 seconds for each inhale and exhale) and even (inhales same lengths as exhales). Relax the forehead, area around the eyes, and jaw, and soften the belly and any other tense areas. If you like, you can chant OM three times to help focus the mind. Now you are ready for your practice.
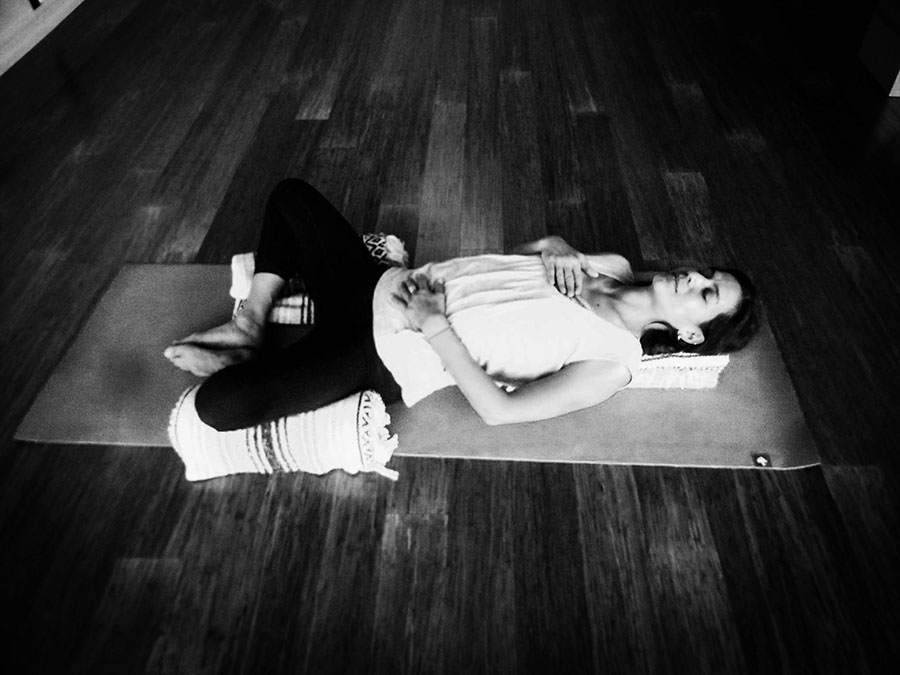
1) Supta Baddha Konasana (Reclined Bound Angle Pose) Use yoga bolster and 2 blocks, or use pillows and blankets.

Supta Baddha Konasana (Reclined Bound Angle Pose)
Sit on the floor and bring soles of the feet together in butterfly position. Have a stack of 2-3 neatly folded blankets (or yoga bolster) right behind your bottom to lie back on (lengthwise so they will support your entire spine and head). Keeping your feet in the butterfly position, lie back onto your support. Your bottom should be on the floor, but your entire back and head will be resting on the blankets or bolster. Place one yoga block, rolled up blanket, or pillow underneath each knee or thigh for added support and deeper relaxation. Arms can be resting by your sides with palms facing up, or you can place one hand on your heart and one on your belly. Close your eyes and quietly observe the breath and mind. Breath should be natural, not forced, during a restorative practice. Keep softening tense areas on your exhales, and gently bring the mind back to observing the breath when the mind wanders. Hold for 2-15 minutes. If you feel any knee pain, readjust the support under your knees, or come out of the pose. If you feel lower back pain, lower the height of the support for your back, or come out of the pose. A slight stretching sensation is welcome, but pain should not be tolerated in any yoga practice. Exit the pose by using hands to bring knees back up together, and then rolling onto your right side with knees bent. Rest there a few cycles of breath, and then push yourself up to sit. This pose improves circulation, stimulates the ovaries, prostrate, bladder, and kidneys, and stretches inner thighs, groin, and knees. This pose can help ease the discomfort of menstrual cramps and menopause.
2) Viparita Karani (Legs up the wall pose) You will need a wall, and yoga bolster or 2 thickly folded blankets.
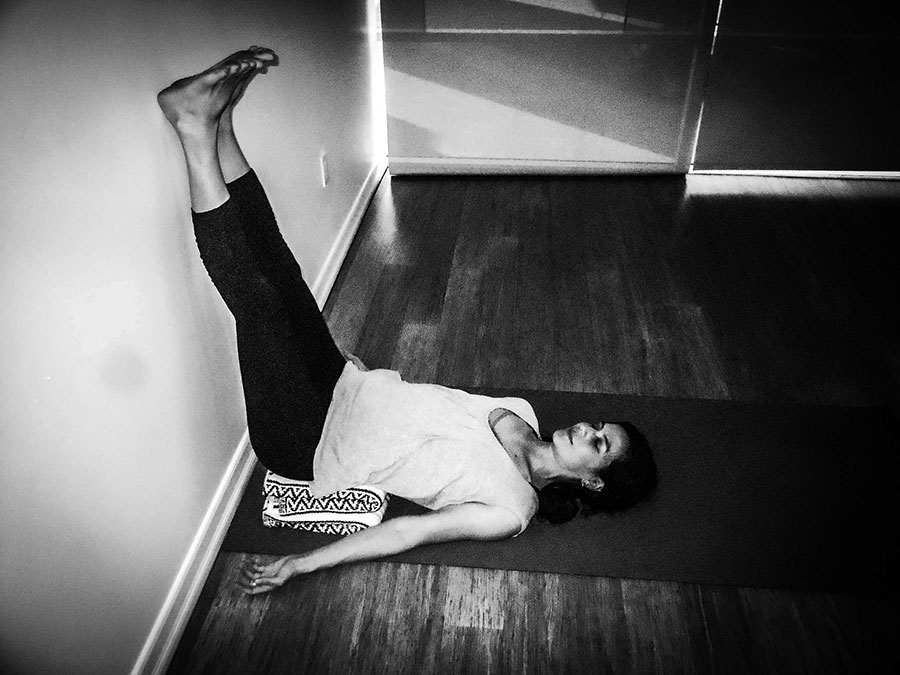
Viparita Karani (Legs up the wall pose)
Place your bolster or stacked and folded blankets horizontally by the wall. Sit on the bolster or blankets sideways, with your side hip touching the wall and knees bent. Scoot in close to the wall as you turn so that your legs are vertically up the wall. Your lower back/lower torso is resting on the bolster or blankets, your upper back, shoulders, and head are resting on the ground, and your legs are vertically against the wall so that you are in an L shape. This pose can also be done without blankets or bolsters – simply lie in an L shape with your torso on the ground and legs up against the wall. The bolster simply gives added support. Arms can be by your sides or overhead. If there is any back discomfort, adjust the bolster’s proximity to the wall, remove it, or come out of the pose. Once in the pose, close your eyes, soften the face and jaw, and observe the breath. Halfway through the pose, you can try a variation by widening your legs against the wall in straddle position. If having your legs fully up against the wall is not comfortable, rest bent legs on a chair instead, as you lay your torso on the ground. Hold for 2- 15 minutes. Exit the pose by bending knees and rolling onto right side. Rest there for a few cycles of breath, and then push self up to seated.
This pose relieves pain or stress in the legs and feet, eases back pain, and calms the mind. It can also help with insomnia. As it is a semi inversion (since you are partially upside down), its benefits includes those of other inversions such as reduction of anxiety, low or high blood pressure, headaches, mild depression, and cramps (when done regularly). As it is a mild inversion, anyone with glaucoma or other eye pressure related problems should avoid this pose.
3) Supported Savasana (final resting pose) – any yoga practice ends with savasana (corpse pose).
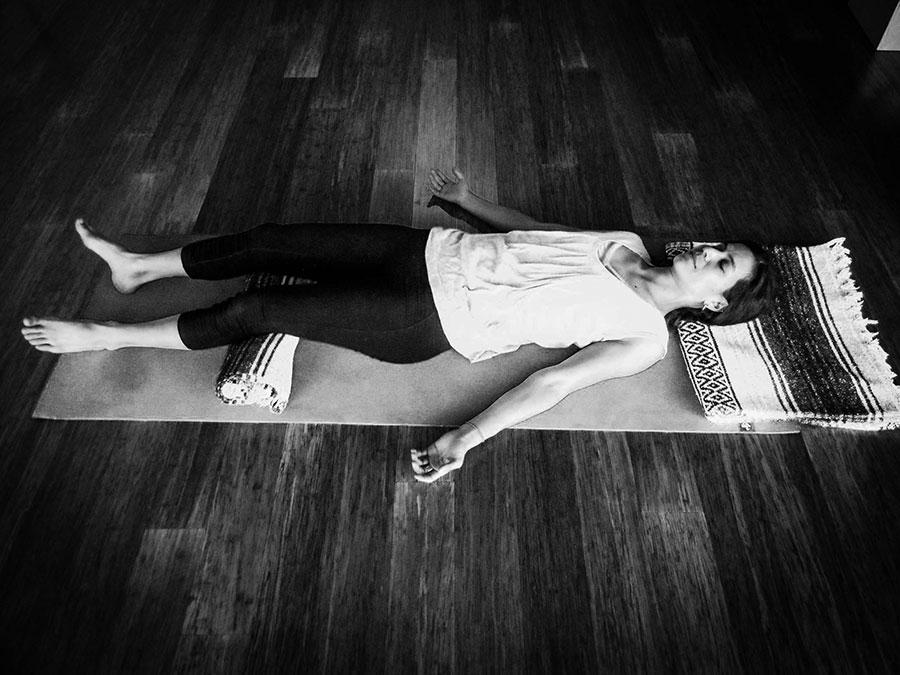
Supported Savasana (final resting pose)
In a restorative practice, savasana is taken with props. Have one blanket folded very thinly underneath your head only (not your neck). Place a yoga bolster, rolled up blanket, or pillow underneath your knees as you lie down. Arms are at a 45 degree angle between your legs and upper body, with palms facing up. Allow feet to relax to the sides. This is called corpse pose, so the body should be as still as a corpse, but the mind awake. To relax, try squeezing and tensing up the muscles from head to toe with an inhale, and then release the tension with an exhale. Once settled into savasana, close eyes, breathe normally, and quiet the mind by observing the breath, the thoughts, and sensations in the body. Have the room dark and silent if possible, and rest for 5-15 minutes.
Come out of your restorative practice slowly, by wiggling fingers and toes, taking a deeper breath, and rolling onto your right side with knees bent. Rest there for a few cycles of breath, and then push yourself up to a sitting position. Take some time to observe the effects of your practice on your body and mind, and perhaps end by chanting OM. Drink water, and move slowly until ready to resume your regular activities.